The Windows clock that is showing on the bottom right corner of the screen follows whatever time zone that it is set to. There is no need to adjust the date and time manually after setting the time zone because the operating system will do that automatically for you which is very convenient. If you have moved to a different state or country, you can simply choose the time zone or city that you are in and the date and time will be automatically set accordingly. By simply changing the time zone on the computer is mostly convenient if you are always on the move with your laptop computer so that you can always keep track of time.
Here are the steps to adjust the time zone on Windows 10 Pro.
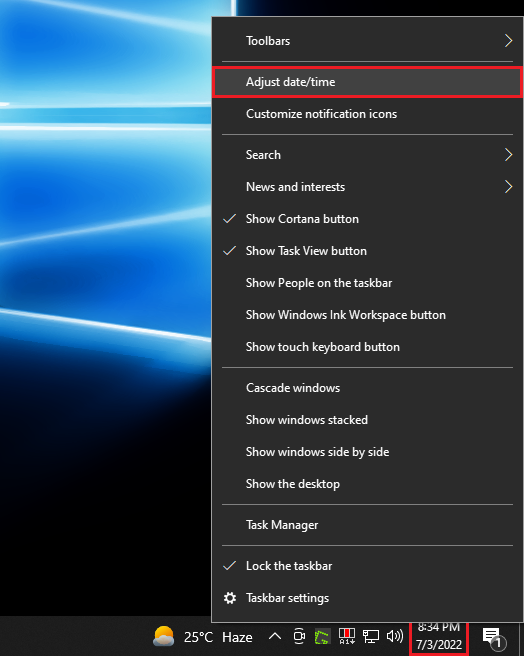
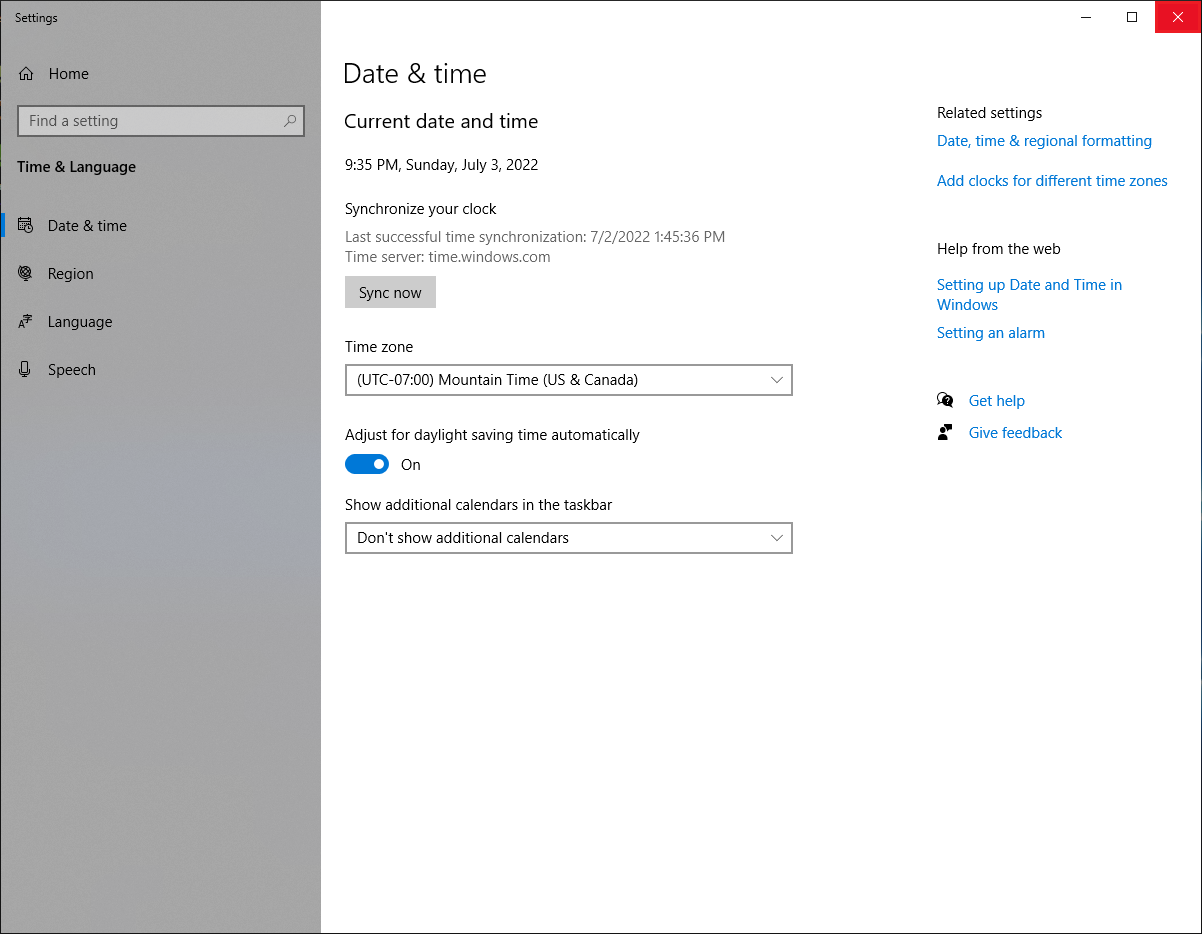
1. Right-click on the Windows clock that is usually located on the bottom right corner and choose ADJUST DATE/TIME option.
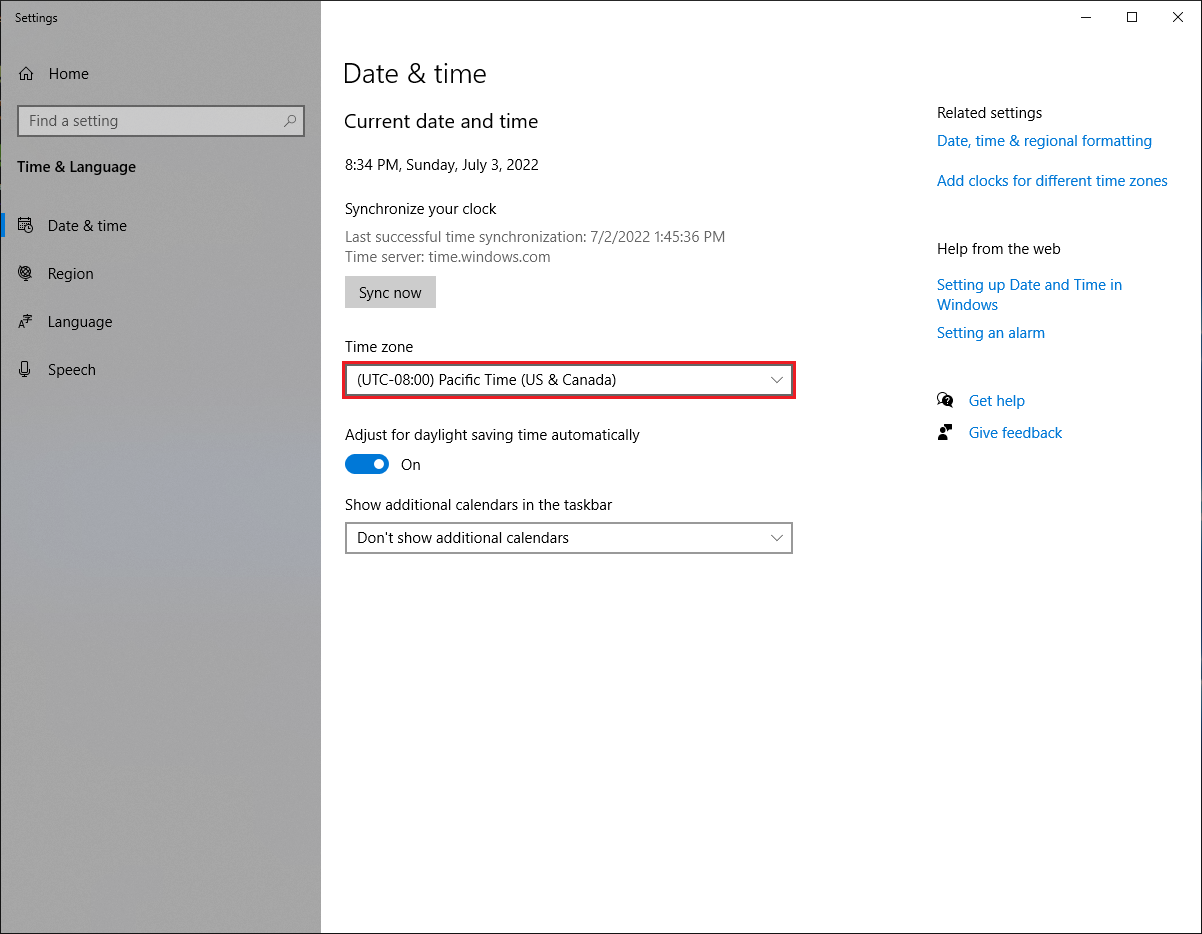
2. Click the pull down menu labeled "Time zone" to show the options.
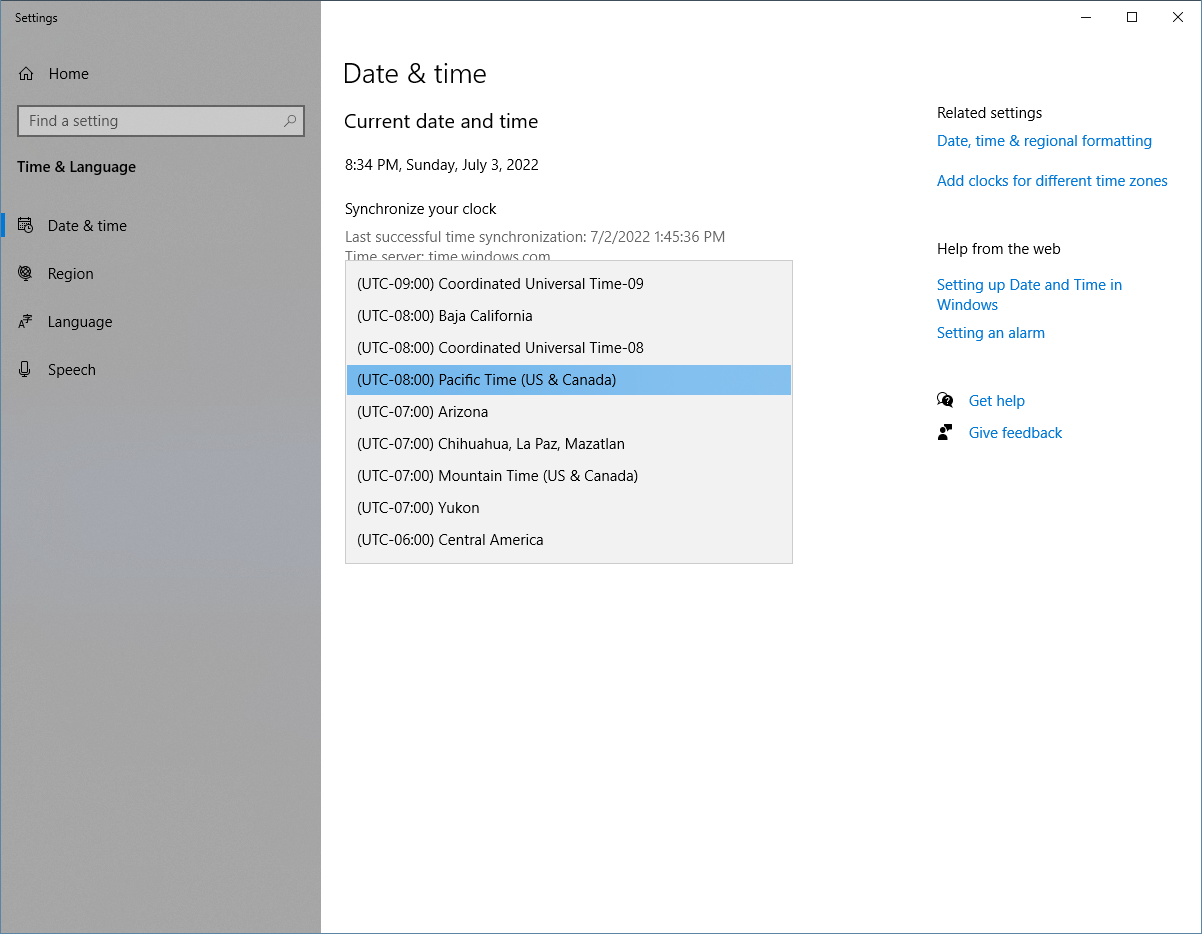
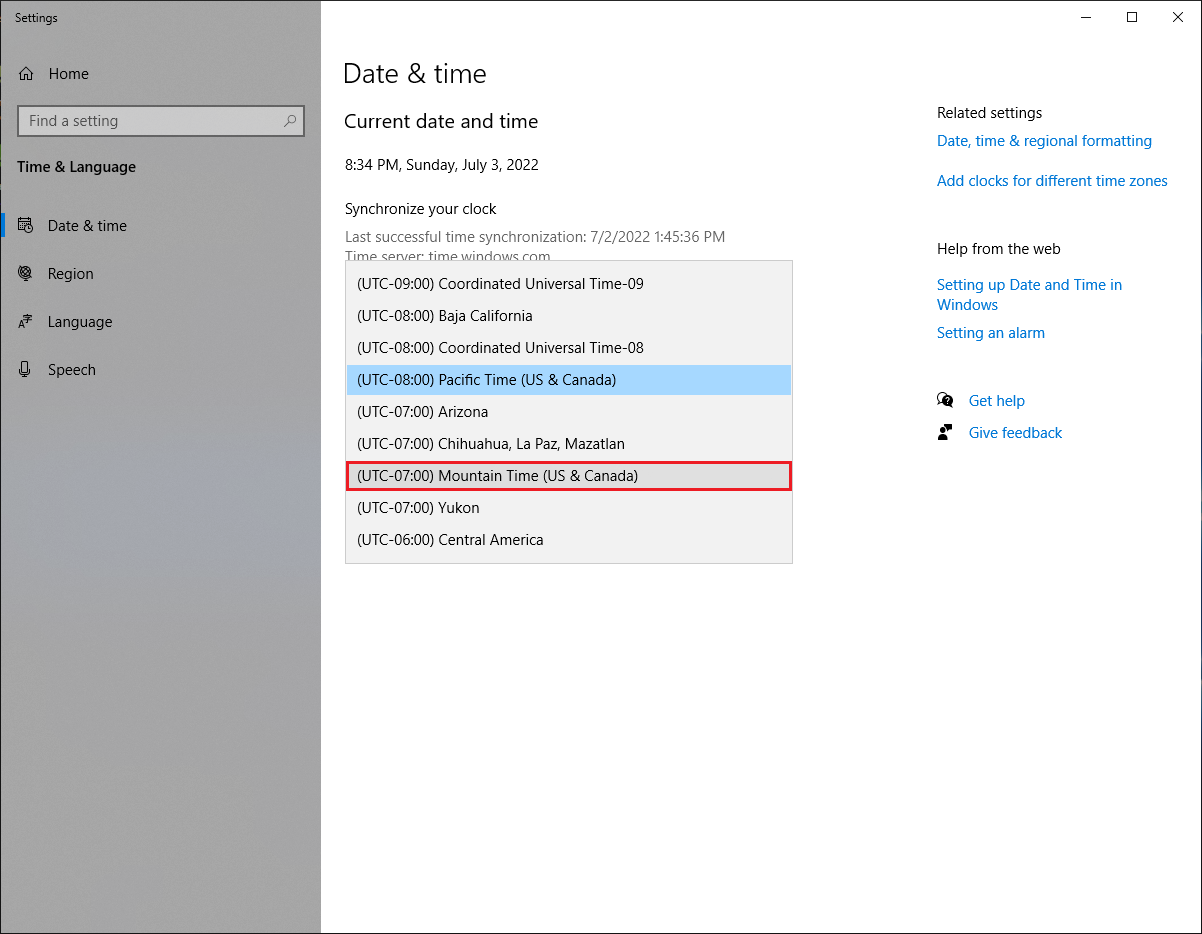
3. You can now choose which time zone you are located by clicking on it which in this case, click the (UTC-07:00) MOUNTAIN TIME (US & CANADA) time zone.
4. Click the X button located at the top right corner of the Settings window.
Here are the steps to adjust the time zone on Windows 10 Pro.
1. Right-click on the Windows clock that is usually located on the bottom right corner and choose ADJUST DATE/TIME option.
2. Click the pull down menu labeled "Time zone" to show the options.
3. You can now choose which time zone you are located by clicking on it which in this case, click the (UTC-07:00) MOUNTAIN TIME (US & CANADA) time zone.
4. Click the X button located at the top right corner of the Settings window.
No comments:
Post a Comment