The newer versions of the Google Chrome browser does not have the option to turn off its automatic update. The Google Chrome browser will automatically search for an update once it detected internet connection after you launched it. If you are on a limited data plan, it will eat up all your data right away. Though it is a good practice to have your browser up to date for security reasons, there are many valid reasons why you should opt out of the update, such as, your computer specifications will not be able to handle an updated Google Chrome, the extension that you are using for productivity does not have compatible version for the latest version, and other reasons that might be personal to you. As long as you practice safe browsing habit, you will be safe from privacy loss. Thankfully, there is method to disable the Google Chrome update through the operating system.
Here are the steps to completely remove the Google Chrome updater.
1. Click the START button usually located on the bottom left corner of the screen.
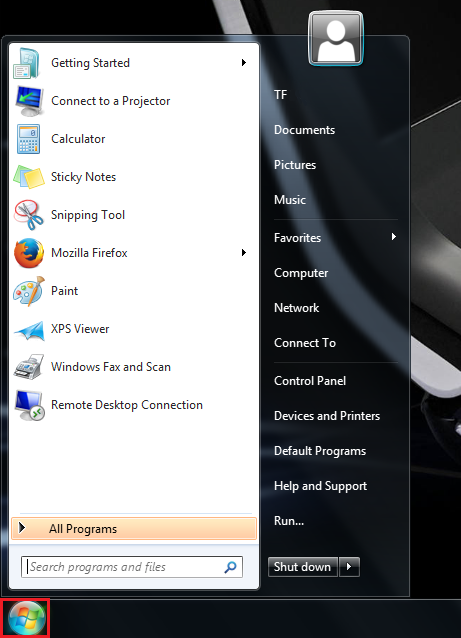
2. Type services.msc in the search box. This portion will depend on the operating system that you are using, you just need to figure it out where the search option on your version of Windows operating system. Open the SERVICES program once found on the search result by clicking or double-clicking on it depending on your operating system.

3. Scroll down the Services list.

4. Double-click on the GOOGLE UPDATE SERVICE (GUPDATE) to open its properties dialogue window.
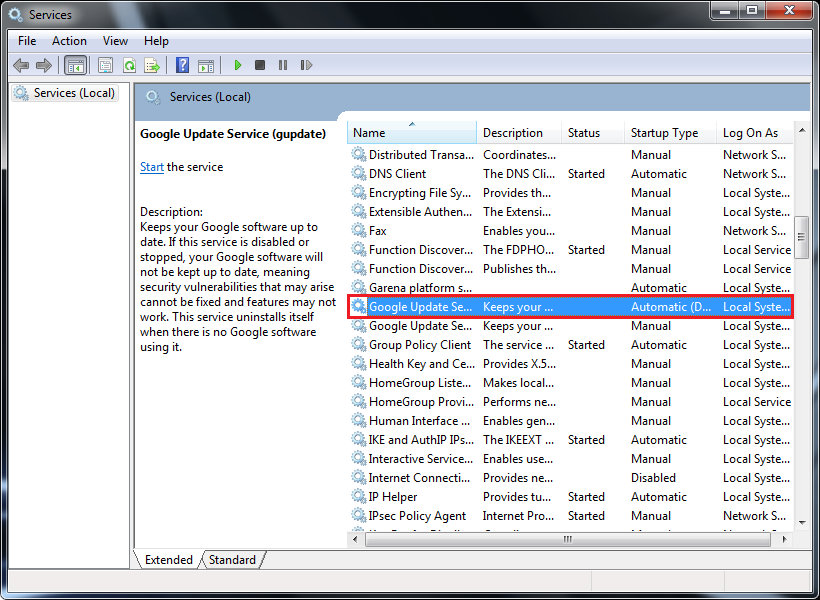
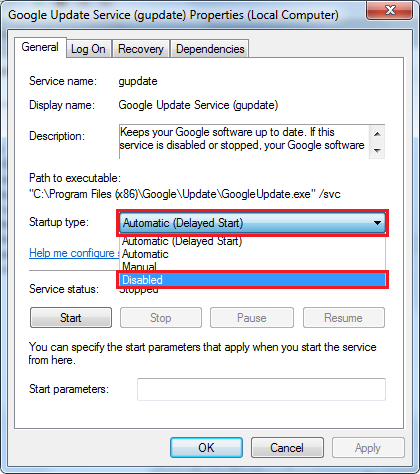
5. Click the pull down menu labeled "Startup type:" and choose DISABLED option.
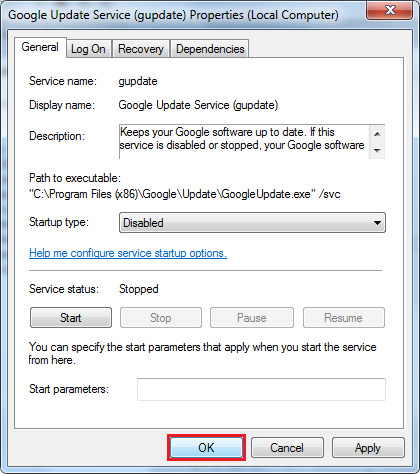
6. Click the OK button.
7. Double-click on the GOOGLE UPDATE SERVICE (GUPDATEM) to open its properties dialogue window.
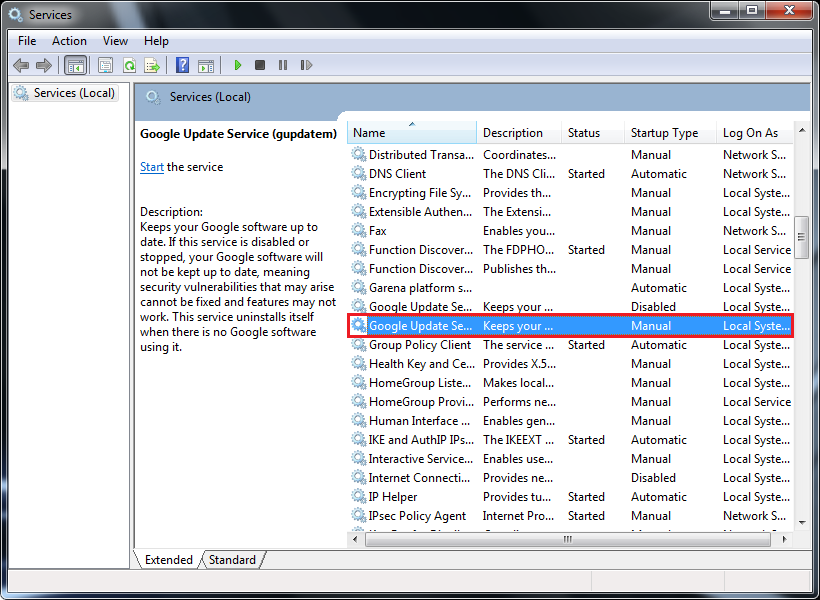
8. Click the pull down menu labeled "Startup type:" and choose DISABLED option too.
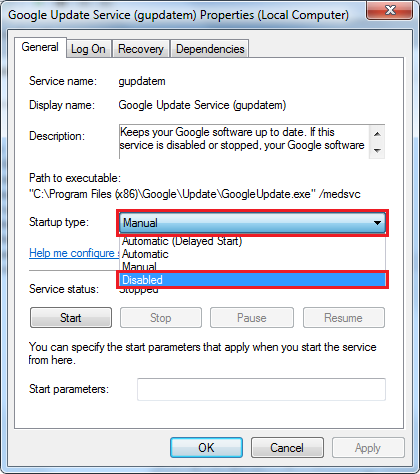
9. Click OK button.
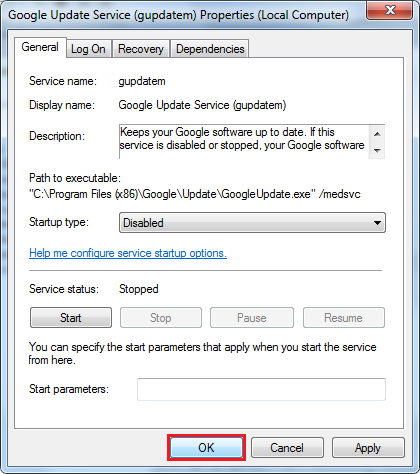
10. Click the X button located on the top right corner of the Services window to close it.
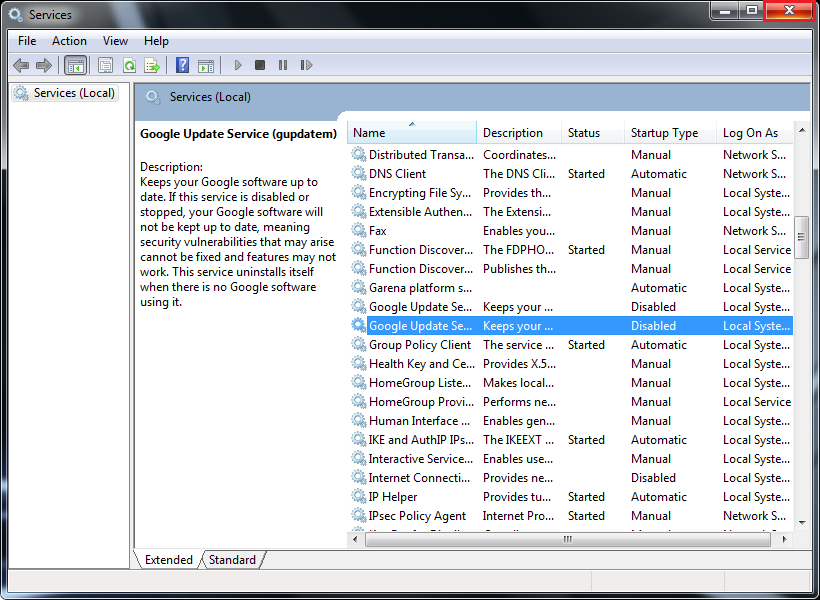
11. Click the START button, then click COMPUTER option to open the Windows Explorer or File Explorer.

12. Expand the Drive C:, which in this case, the OS64 (C:) drive.
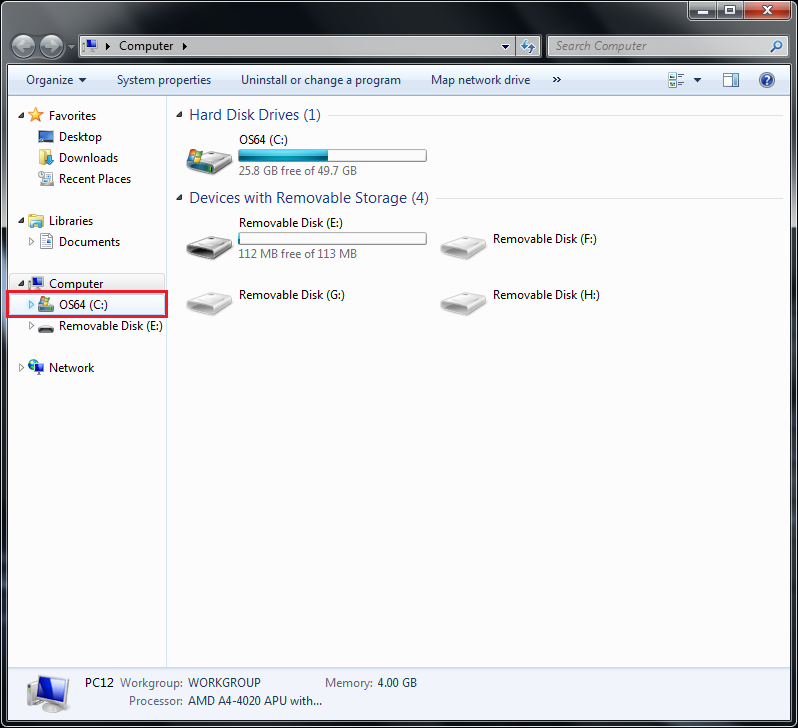
13. Expand the PROGRAM FILES (x86) folder.
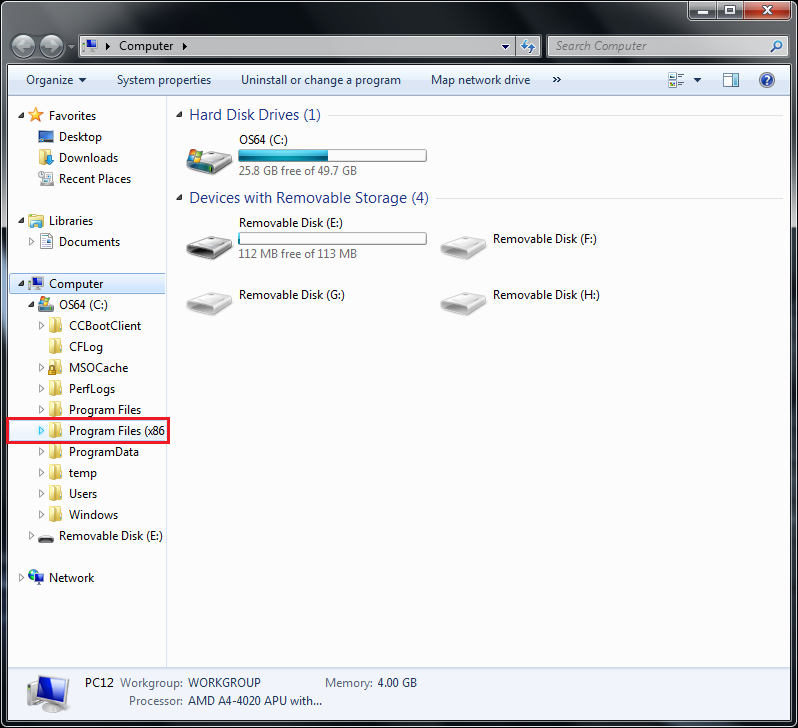
14. Expand the GOOGLE folder.
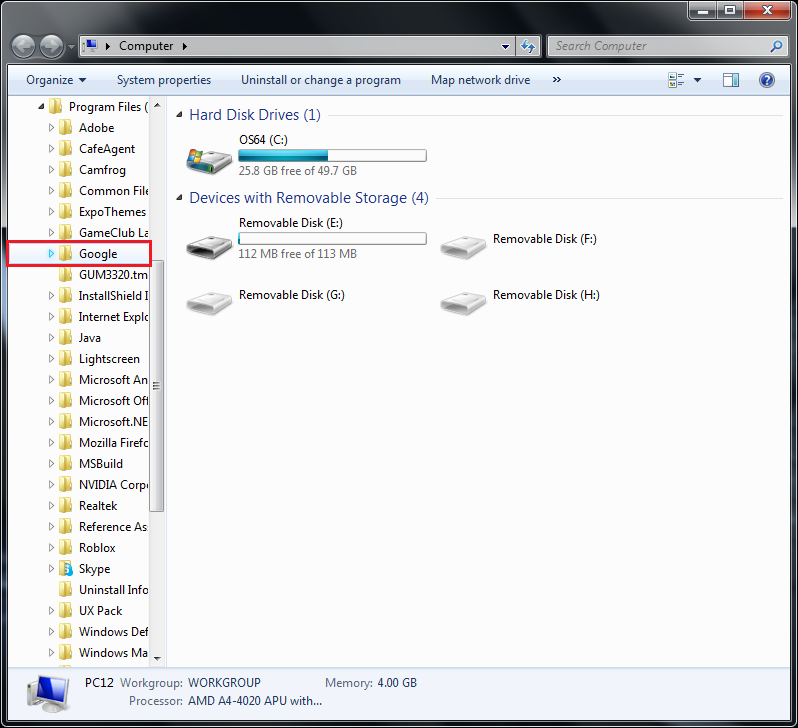
15. Right-click on the UPDATE folder, then choose DELETE option.
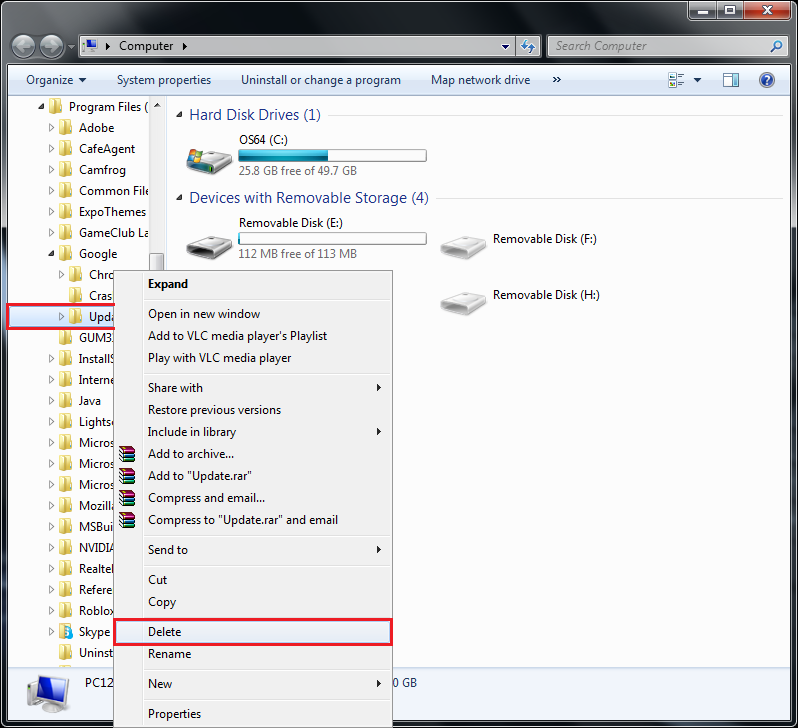
16. Click the YES button to confirm deletion if prompted.

Here are the steps to completely remove the Google Chrome updater.
1. Click the START button usually located on the bottom left corner of the screen.

2. Type services.msc in the search box. This portion will depend on the operating system that you are using, you just need to figure it out where the search option on your version of Windows operating system. Open the SERVICES program once found on the search result by clicking or double-clicking on it depending on your operating system.

3. Scroll down the Services list.

4. Double-click on the GOOGLE UPDATE SERVICE (GUPDATE) to open its properties dialogue window.

5. Click the pull down menu labeled "Startup type:" and choose DISABLED option.

6. Click the OK button.

7. Double-click on the GOOGLE UPDATE SERVICE (GUPDATEM) to open its properties dialogue window.

8. Click the pull down menu labeled "Startup type:" and choose DISABLED option too.

9. Click OK button.

10. Click the X button located on the top right corner of the Services window to close it.

11. Click the START button, then click COMPUTER option to open the Windows Explorer or File Explorer.

12. Expand the Drive C:, which in this case, the OS64 (C:) drive.

13. Expand the PROGRAM FILES (x86) folder.

14. Expand the GOOGLE folder.

15. Right-click on the UPDATE folder, then choose DELETE option.

16. Click the YES button to confirm deletion if prompted.

No comments:
Post a Comment