The Opera browser is one of the major browsers in the world that offers unique features like the speed dialer. Its interface is noticeably different from Internet Explorer and or Firefox browser especially on how you open its menu. The Opera browser is developed by Opera Software with proprietary freeware license with open-source components. This browser is being used on many devices from smart phones to personal computers and can be installed on various operating systems. Every browser downloads the files of the webpages that you open to the computer, which are called temporary internet files or cache. These files are used by the browser when you view the webpage again so that it will be faster to render it to the screen instead of the browser accessing the webpage from the server again. The browser cache does not pose security threats but they consume hard drive space and they can accumulate as view webpages. The browser cache can also cause problems like slowness or showing an old content instead of the updated webpage. From time to time, it is advisable to clear the browser cache for performance purposes. Previous versions of the Opera browser does not employ the CTRL + SHIFT + DEL shortcut to go to the window where you can clear the browser cache.
Here are the steps to clear the browser cache on Opera 30.0 browser.
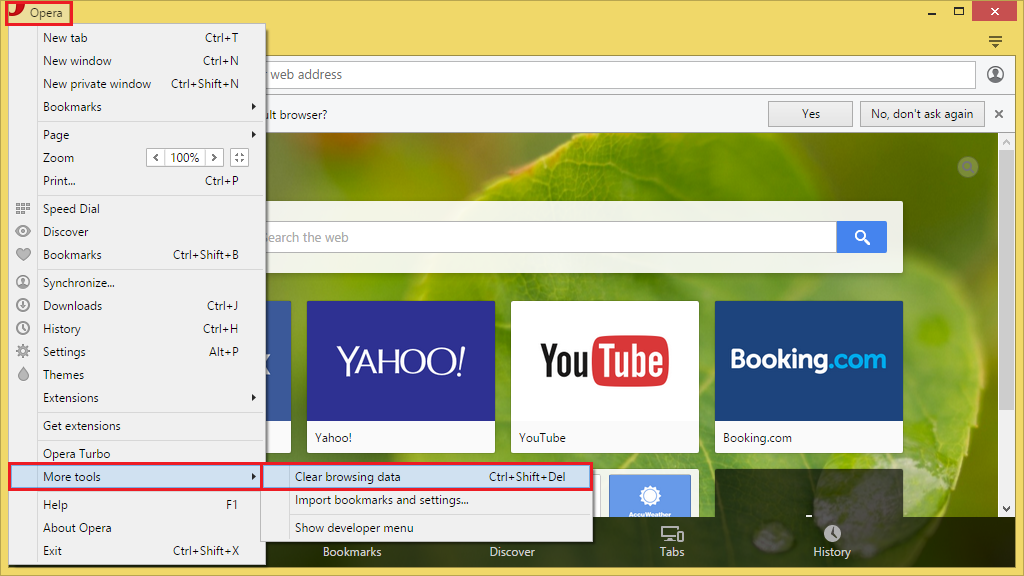
1. Click the OPERA button located on the top left corner of the Opera browser, click MORE TOOLS, then click the CLEAR BROWSING DATA option.

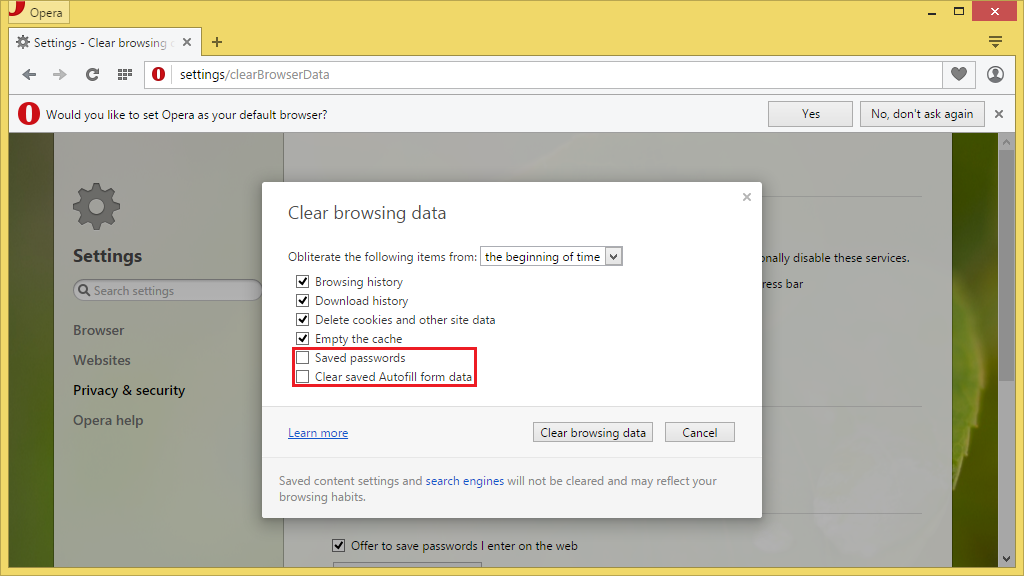
2. Click the pull down menu for "Obliterate the following items from:" and choose THE BEGINNING OF TIME option.

3. Click the check boxes for "Saved passwords" and "Clear saved Autofill form data" to put check marks in them.

4. Click the CLEAR BROWSING DATA button.

Here are the steps to clear the browser cache on Opera 30.0 browser.
1. Click the OPERA button located on the top left corner of the Opera browser, click MORE TOOLS, then click the CLEAR BROWSING DATA option.

2. Click the pull down menu for "Obliterate the following items from:" and choose THE BEGINNING OF TIME option.

3. Click the check boxes for "Saved passwords" and "Clear saved Autofill form data" to put check marks in them.

4. Click the CLEAR BROWSING DATA button.

No comments:
Post a Comment