Emptying the cache on the Safari browser for Windows operating system also takes a few steps as well as resetting it. Erasing the History, Cache, Download History, Cookies, Icons, Saved Names and Passwords, Autofill on Forms, Recent Web Searches, and even closing of all of the Safari windows are all in the same easy to find place. This is also the same trick on the Firefox 3.0.5 where you can erase all of your private data at the same time. Computing should not make things difficult but easier, that's what they were made of.
One thing I find amusing with the Safari for Windows and Macintosh is that it have an option for Private Browsing for more secured browsing especially if you are using a public computer.
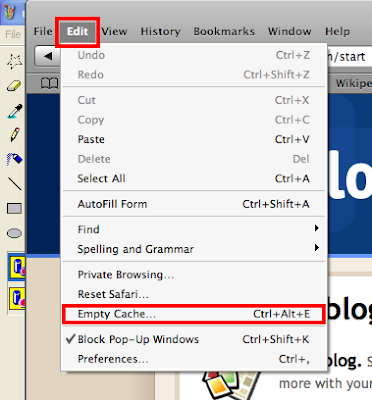
1. To empty the cache, click the EDIT menu on the Safari browser across its top and choose EMPTY CACHE...
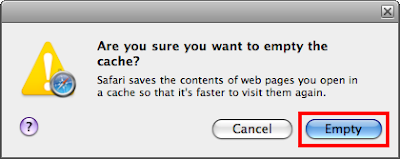
2. Click the EMPTY button.
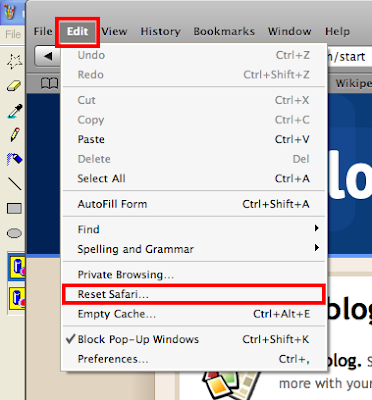
3. To reset Safari, click the EDIT menu on the Safari browser across its top and choose RESET SAFARI...
4. By default, all options are checked. You can choose if which information that you do not want to be erased by un-checking it.
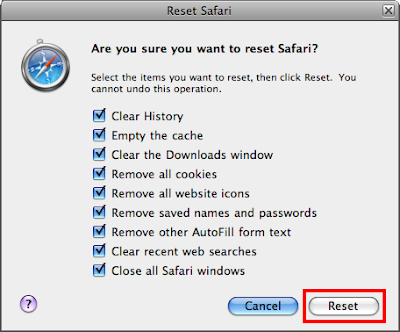
5. Click RESET button.
6. To turn on the Private Browsing, click the EDIT menu again and choose PRIVATE BROWSING... Then a check mark will appear before it indicating that it is on.
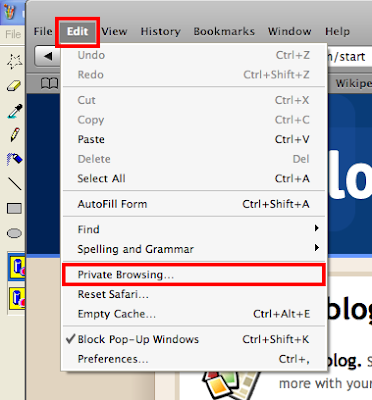
7. Click OK button to turn on the Private browsing.
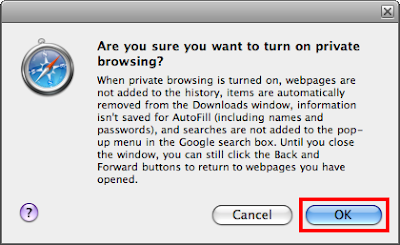
8. To turn off the Privatge Browsing, just do the same steps to remove the check before it.
One thing I find amusing with the Safari for Windows and Macintosh is that it have an option for Private Browsing for more secured browsing especially if you are using a public computer.
1. To empty the cache, click the EDIT menu on the Safari browser across its top and choose EMPTY CACHE...

2. Click the EMPTY button.

3. To reset Safari, click the EDIT menu on the Safari browser across its top and choose RESET SAFARI...

4. By default, all options are checked. You can choose if which information that you do not want to be erased by un-checking it.

5. Click RESET button.
6. To turn on the Private Browsing, click the EDIT menu again and choose PRIVATE BROWSING... Then a check mark will appear before it indicating that it is on.

7. Click OK button to turn on the Private browsing.

8. To turn off the Privatge Browsing, just do the same steps to remove the check before it.
Jesus
ReplyDelete