Adding fonts on your computer is a lot of fun because you can present your text beautifully according to your taste, business purpose, for fun, and anything that you think that will present your document accordingly. And of course, it is always satisfying if you can always put your own customization to your fonts to reflect your mood and personality. And it is true that so many people choose a default font on everything that they type because it really makes you feel good.
One example is if you are creating certificates where you can type your text in Old English lettering. Another is when making business letterheads, birthday invitation cards, wedding invitation cards, and or even public announcements.
Adding fonts to the computer at first can be baffling, but that truth is that it is just very easy as one, two, three clicks.
And what makes adding font to the computer more fun is that you can find a lot of fonts on the internet that are ready made and ready to download for you to install, and believe it, for free!
You can easily search for free fonts on the internet just by seaching "free fonts" using your search engine.
In this example, you will learn how to install fonts manually assuming that you already downloaded the font that you like on your desktop view, which in this case, we will be using the Algeria font style.
1. Right-click on the font file that you downloaded to your desktop and choose COPY option.

2. Right-click on the MY COMPUTER icon on the desktop and choose EXPLORE.

3. Click on the LOCAL DISK (C:) icon.
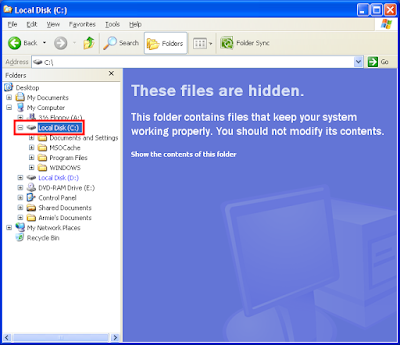
4. Click on WINDOWS folder.

5. Right-click on FONTS folder and choose PASTE option.
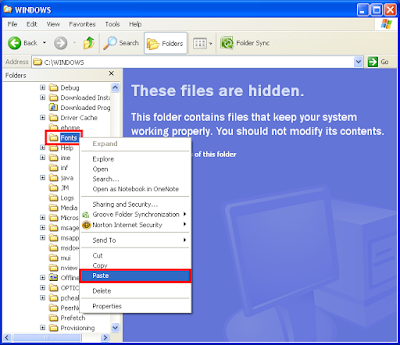
6. Your font will now be installed.

No comments:
Post a Comment